![]()
![]()
![]()
![]()
![]()
![]()
![]()
The Studio Archives
A Spiral Quilt for Stefanie
page 4
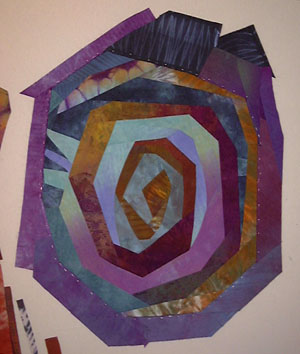 |
Here's the last picture from page 3 again, so you can see what happens next. |
|
Well, basically it grew!
In this image, some of the fabrics are pieced together, and some are not. Notably, the "tentacles" are not part of the construction, but something like them (and more of them) will be in the finished piece. |
 |
|
At this point what's up on my wall is getting pretty big, so it's time to start thinking about what I've pieced in terms of the overall dimensions of the finished quilt. The bed is 180 cm wide by 200 cm long, so that's what I think of as the "center" of the quilt. We want some overhang on both sides and the bottom, as well as enough extra at the top of the bed to fold over the bedpillows when the bed is made. If I added 30 cm to each edge, I'd end up with a finished quilt of 240 x 260 cm, which is rather larger than the batting I use, so I'm planning to do something a little different with this quilt; I'll construct the top 50 cm of the quilt without batting. In other words, the part of the quilt that covers the bedpillows when the bed is made will simply fold down when the bed is in use. |
|
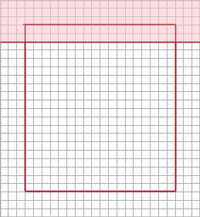 |
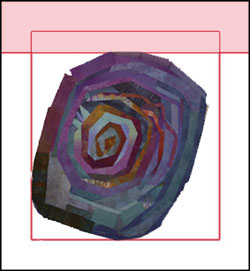
Back to the computer for design work! Here on the left you see a drawing I did in Photoshop, with the overall dimensions of 240 x 260 cm. Each grey line on the grid represents 10 cm (about 4"). The dark red lines show the size of the bed, and the pink region at the top is the part that will fold over the pillows (i.e. won't be filled with batting). |
|
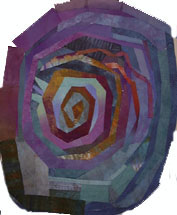
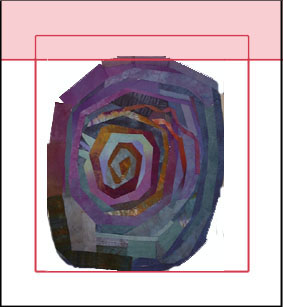
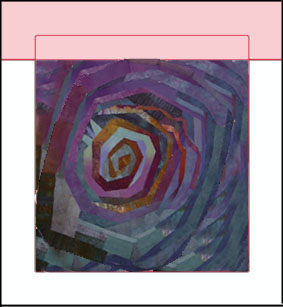
Now comes the fun play part! In Photoshop, I can paste in the actual picture of what's on the wall over the dimensional drawing I've made. You don't see the grid anymore, but I can make it appear in my program if I need to. And below, I try another couple things: I rotate the spiral a bit, and then I add more "stuff" to fill out the corners of the center part of the quilt. (Again in Photoshop, I've done this with the "clone" tool, essentially copying and pasting bits of what is in the spiral picture.) |
 |
 |
 |
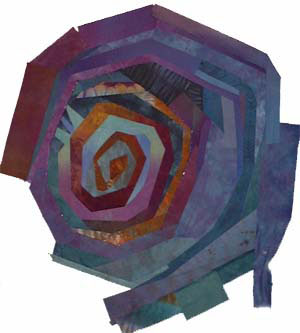 |
ok, back to reality. The truth is, that whenever I plan something on the wall, and then piece part of it (which means taking it off the wall), I don't end up with exactly what I'd planned on the wall in the first place. So to the left, you see a picture of what the piece actually looks like on my wall now (again, most of it's pieced, but the bit around the edges is still in flux!) |
|
|
|
back to archives page
home | store | studio & archives | gallery | fabrics | more information
|
|
© 2006 Colorquilts. All rights reserved.